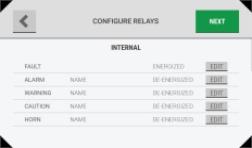
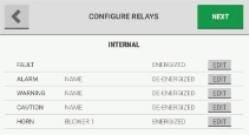
Relay Configuration
Each relay is mapped to a specific predetermined function; that is, fault, alarm, warning, caution, or horn.
|
|
|
1.
|
On the "Configure Relays" screen, select "Edit" for the function to configure. |
NOTE: The options for the configuration settings for alarms, warnings, cautions, and the horn are identical.
|
|
|
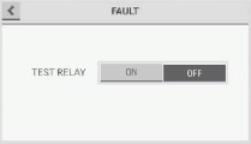
The default setting for the internal fault relay is the energized state. To test the relay, do the following:
|
|
|
|
2.
|
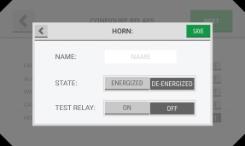
In the relay configuration pop-up, select the "Name" field, and use the alphanumeric keyboard pop-up to enter a value. |
NOTE: Relay names can have eight characters.
|
|
|
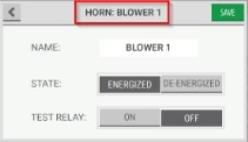
NOTE: The title in the pop-up header changes to show the assigned name.
|
3.
|
Select "Energized" or "De-energized" for the relay state. |
|
4.
|
Do the following to test the relay: |
|
b.
|
Make sure the equipment connected to the relay operates as expected. |
|
5.
|
Select "Save". The updated settings for the relays show on the "Configure Relays" screen. |
|
|
|
|
6.
|
Repeat Steps (1) through (5) for each relay to be configured. |
|
7.
|
When all relays have been configured, select "Next". |
|
|
|
|
8.
|
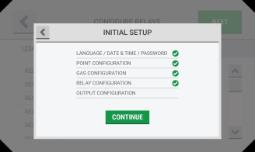
The "Initial Setup" screen shows a check mark beside the "Relay Configuration" step to indicate that it is complete. Select "Continue" to go to the output configuration setup. |
|