Mounting
Use the mounting bracket (PN 71370-1) and hardware to install the device on a wall, pole, or other surface. The design of the mounting bracket lets you adjust optical alignment while keeping the device in a fixed position.
To attach the mounting bracket to drywall, install at least two fasteners to the stud behind the drywall to give support for the weight of the device. The recommended fastener is a 3‑in. #12 screw.
Use the dimensions shown in Figures 10 through 14 to install the device correctly. Make sure that the device:
| • | Is in a location where personnel and objects cannot cause a blockage of the field of view |
| • | Is in a location that is convenient for visual inspection and cleaning |
| • | Is in a location where ice, dirt, or debris cannot collect on the optical window |
| • | Point downward about 15-20 degrees to prevent dust and moisture from collecting on the optical window. |
|
General Monitors does not recommend the use of cable shoes or crimps on any junction box or housing wiring terminals. Poor crimping can cause a bad connection when temperature variations occur. |
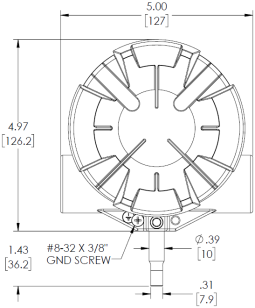
Figure 10 FL500 Outline Drawing, Front View
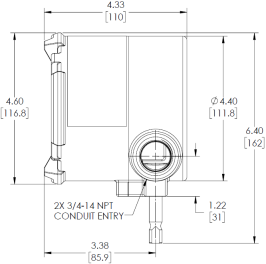
Figure 11 FL500 Outline Drawing, Side View
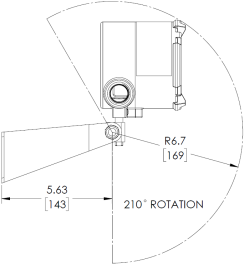
Figure 12 FL500 and Mounting Bracket, Side View
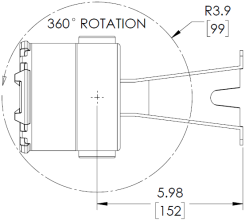
Figure 13 FL500 and Mounting Bracket, Top View
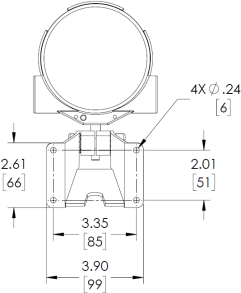
Figure 14 FL500 and Mounting Bracket, Rear View